0%

最近一台机器(环境为:Ubuntu+NVIDIA-384.130)重启后发生了找不到GPU驱动的问题:

1
NVIDIA-SMI has failed because it couldn't communicate with the NVIDIA driver. Make sure that the latest NVIDIA driver is installed and running.

这个问题的原因一般是Ubuntu的内核版本更新了,而显卡驱动是在低版本的内核时安装的,因此发生了不兼容的问题。以往的解决方法是修改Ubuntu默认开机启动的内核版本:需要找到之前使用的内核版本(查看系统已安装内核版本时发现有好几个,也忘记之前安装驱动时内核版本是哪个),并修改grub开机配置,之后便是删除无用内核并禁止内核更新(记得之前已做过这个步骤,但这次内核还是更新了?)

鉴于上述方法过于复杂,这次采用新的方法:基于新的内核重新生成GPU的驱动模块。

  1. 安装DKMS
    DKMS全称是Dynamic Kernel Module Support,它可以帮我们维护内核外的驱动程序,在内核版本变动之后可以自动重新生成新的模块。

    1
    sudo apt-get install dkms
  2. 查看安装的NVIDIA-GPU驱动版本

    1
    ls /usr/src
  3. 重新生成驱动模块

    1
    sudo dkms install -m nvidia -v 384.130
  4. 检验

    1
    nvidia-smi
  5. 重新设置内核禁止更新

    1
    2
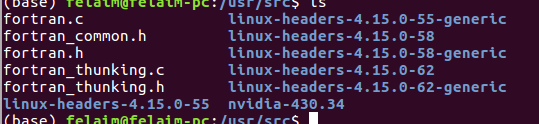
    uname -a  # 查看正在使用的内核,e.g. linux-image-4.15.0-88-generic
    sudo apt-mark hold linux-image-4.15.0-88-generic

若成功,可以看到显卡信息。


插曲

在安装dkms时出现了两个小问题:

1、当前源中找不到相应的安装包

1
2
3
4
5
6
7
8
9
10
11
12
13
14
1)使用 sudo vim /etc/apt/sources.list 修改镜像源
2)然后执行 sudo apt-get update 更新

## 阿里源
deb http://mirrors.aliyun.com/ubuntu/ trusty main restricted universe multiverse
deb http://mirrors.aliyun.com/ubuntu/ trusty-security main restricted universe multiverse
deb http://mirrors.aliyun.com/ubuntu/ trusty-updates main restricted universe multiverse
deb http://mirrors.aliyun.com/ubuntu/ trusty-proposed main restricted universe multiverse
deb http://mirrors.aliyun.com/ubuntu/ trusty-backports main restricted universe multiverse
deb-src http://mirrors.aliyun.com/ubuntu/ trusty main restricted universe multiverse
deb-src http://mirrors.aliyun.com/ubuntu/ trusty-security main restricted universe multiverse
deb-src http://mirrors.aliyun.com/ubuntu/ trusty-updates main restricted universe multiverse
deb-src http://mirrors.aliyun.com/ubuntu/ trusty-proposed main restricted universe multiverse
deb-src http://mirrors.aliyun.com/ubuntu/ trusty-backports main restricted universe multiverse

2、该死的samba服务报错信息。

1
2
3
4
5
6
7
8
9
10
11
12
13
14
15
16
17
dpkg: error processing package samba (--configure):
dependency problems - leaving unconfigured
Errors were encountered while processing:
samba-common
samba-common-bin
samba
E: Sub-process /usr/bin/dpkg returned an error code (1)

## 解决方案:
$ sudo mv /var/lib/dpkg/info /var/lib/dpkg/info_old //现将info文件夹更名
$ sudo mkdir /var/lib/dpkg/info //再新建一个新的info文件夹
$ sudo apt-get update
$ sudo apt-get -f install
$ sudo mv /var/lib/dpkg/info/* /var/lib/dpkg/info_old
//执行完上一步操作后会在新的info文件夹下生成一些文件,现将这些文件全部移到info_old文件夹下
$ sudo rm -rf /var/lib/dpkg/info //把自己新建的info文件夹删掉
$ sudo mv /var/lib/dpkg/info_old /var/lib/dpkg/info //把以前的info文件夹重新改回名字

Ref:

CASE SOLVED:NVIDIA-SMI has failed because it couldnt communicate with the NVIDIA driverr_运维_Felaim的博客-CSDN博客
https://blog.csdn.net/Felaim/article/details/100516282

NVIDIA-SMI has failed because it couldnt communicate with the NVIDIA driver问题排查_运维_u014447845的博客-CSDN博客
https://blog.csdn.net/u014447845/article/details/103012088

ubuntu 禁止内核更新 - 天道酬勤、 - 博客园
https://www.cnblogs.com/zxj9487/p/11386227.html

ubuntu映射网络驱动器失败,以及samba服务 - 简书
https://www.jianshu.com/p/89b7831181ab

在进行深度学习炼金时,经常需要花费很长一段时间等待结果,因此想变主动为被动,让程序在运行结束时将结果通过短信主动发送到我的手机上,省得我每次都要通过ssh连接服务器进行查看。

搜索了一下教程,找到两个心仪的解决方案:Twilio、腾讯云短信,基本套路是通过调用Python接口进行短信转发。Twilio提供500条免费短信,腾讯云短信则提供100条,不过腾讯云在1万条内的价格是5分钱一条,尚可接受。目前的解决方案是先用完Twilio的500条后再转战腾讯云。

  • Twilio

    1. 注册

      网址为:https://www.twilio.com,教程见:https://www.cnblogs.com/pythoncircle/p/11790463.html

    2. API调用模板(简单)

      1
      2
      3
      4
      5
      6
      7
      8
      9
      10
      11
      12
      13
      14
      15
      16
      17
      18
      # Download the helper library from https://www.twilio.com/docs/python/install
      from twilio.rest import Client


      # Your Account Sid and Auth Token from twilio.com/console
      # DANGER! This is insecure. See http://twil.io/secure
      account_sid = 'your_acco_sid'
      auth_token = 'your_auth_token'
      client = Client(account_sid, auth_token)

      message = client.messages \
      .create(
      body="Join Earth's mightiest heroes. Like Kevin Bacon.",
      from_='+150XXXXXXXXX',
      to='+86XXXXXXXXXXX'
      )

      print(message.sid)

      需替换自己的account_sid,auth_token,获得的虚拟号码(from_),发送的号码(to),信息(body),运行前安装twilio:pip install twilio

    3. 实际上没有500条,因为原始赠送金额是15美元,获得虚拟号码及部署项目时会用掉1.056美元,不过可忽略不计,每条短信价格是0.28美元。

  • 腾讯云短信

在TensorFlow的可视化工具Tensorboard中,有一个相当好用的选项:设置曲线的smooth参数。我们可以通过增大这个参数的设置,使得原本波动起伏很大的曲线变得平滑,从而得到更加清晰的变化趋势。

虽然Tensorboard提供了数据下载的接口(csv、json格式),但是只针对于原始数据,因此在进行绘图时有必要实现跟Tensorboard一样的平滑设置。参照Tensorboard中使用的smooth函数,编写数据处理脚本如下:

1
2
3
4
5
6
7
8
9
10
11
12
13
14
15
16
17
18
19
20
21
22
23
24
25
26
27
28
29
30
31
32
33
34
35
36
37
38
39
40
41
42
43
44
45
46
47
import pandas as pd
import numpy as np
import os
import matplotlib.pyplot as plt

def smooth(csv_path, weight=0.85):
data = pd.read_csv(filepath_or_buffer=csv_path, header=0, names=['Step','Value'], dtype={'Step':np.int, 'Value':np.float})
scalar = data['Value'].values
last = scalar[0]
smoothed = []
for point in scalar:
smoothed_val = last * weight + (1 - weight) * point
smoothed.append(smoothed_val)
last = smoothed_val

save = pd.DataFrame({'Step':data['Step'].values, 'Value':smoothed})
save.to_csv('smooth_' + csv_path)


def smooth_and_plot(csv_path, weight=0.85):
data = pd.read_csv(filepath_or_buffer=csv_path, header=0, names=['Step','Value'], dtype={'Step':np.int, 'Value':np.float})
scalar = data['Value'].values
last = scalar[0]
print(type(scalar))
smoothed = []
for point in scalar:
smoothed_val = last * weight + (1 - weight) * point
smoothed.append(smoothed_val)
last = smoothed_val

# save = pd.DataFrame({'Step':data['Step'].values, 'Value':smoothed})
# save.to_csv('smooth_' + csv_path)

steps = data['Step'].values
steps = steps.tolist()
origin = scalar.tolist()

fig = plt.figure(1)
plt.plot(steps, origin, label='origin')
plt.plot(steps, smoothed, label='smoothed')
# plt.ylim(0, 220) # Tensorboard中会滤除过大的数据,可通过设置坐标最值来实现
plt.legend()
plt.show()

if __name__=='__main__':
# smooth('total_loss.csv')
smooth_and_plot('total_loss.csv')

可视化效果如下图:

扩展:

上述smooth函数旨在构建一个类似于IIR滤波器的结构以滤除高频部分保留低频部分,即让数据变化更加平缓。

Ref:

Tensorboard 下Smooth功能探究
https://dingguanglei.com/tensorboard-xia-smoothgong-neng-tan-jiu/

tensorboard 平滑损失曲线代码_人工智能_Charel_CHEN的博客-CSDN博客
https://blog.csdn.net/Charel_CHEN/article/details/80364841

最近在使用YOLOv3模型来训练KITTI数据集,遇到一个不可避免的问题——可复现性。由于所参考的代码(PyTorch_YLOv3)没有做相关的设置,因此也费了些时间去了解和实践。

官方的指导文件见:https://pytorch.org/docs/master/notes/randomness.html ,具体而言,需要考虑以下几个方面:

  1. 随机种子的设定

    • Pytorch的种子设置(CPU&GPU)

      1
      2
      torch.manual_seed(seed)
      torch.cuda.manual_seed_all(seed) # if you are using multi-GPU
    • cuDNN的优化设置

      1
      2
      3
      torch.backends.cudnn.enabled = False
      torch.backends.cudnn.benchmark = False
      torch.backends.cudnn.deterministic = True

      cuDNN使用非确定性算法,能够自动寻找最适合当前配置的高效算法,来达到优化运行效率的问题,可以使用torch.backends.cudnn.enabled = False来进行禁用。当然,禁用后会影响一定的效率。

    • Numpy的种子设置

      1
      np.random.seed(seed)

      对于目标检测等任务来说,经常需要进行数据增强,如随机翻转、多尺度训练等,可以通过设置Numpy的种子来去除非确定性。此外,Pytorch的底层实现中某些模块也调用了Numpy的随机性操作,所以不管是否进行了数据增强操作,都需要设置Numpy的种子。

    • DataLoader的多线程设置

      当DataLoader采用多线程操作时(num_workers > 1),也需要进行随机种子的设置。

      1
      2
      3
      4
      def _init_fn():
      np.random.seed(0)
      train_loader = DataLoader(data_sets, batch_size=8, shuffle=True,
      num_workers=8, worker_init_fn=_init_fn)
    • random模块设置

      1
      random.seed(seed)
  2. Pytorch底层实现代码对于非确定性的引入

    在进行了上述种子设定后,代码基本上具备了可重复性,然而目前Pytorch的某些底层实现仍然存在着不确定性,暂时无法得到解决。比如,Pytorch的上采样操作在反向求导时会存在随机性;API所述,PyTorch使用的CUDA实现中,有一部分是原子操作,尤其是atomicAdd,使用这个操作就代表数据不能够并行处理,需要串行处理,使用到atomicAdd之后就会按照不确定的并行加法顺序执行,从而引入了不确定因素。PyTorch中使用到的atomicAdd的方法:

    前向传播时:

    • torch.Tensor.index_add_()_
    • torch.Tensor.scatter_add()
    • torch.bincount()

    反向传播时:

    • torch.nn.functional.embedding_bag()
    • torch.nn.functional.ctc_loss()
    • 其他pooling,padding, sampling操作

这次在进行YOLOv3(Pytorch版)的训练时,采用的种子设定脚本为:

1
2
3
4
5
6
7
8
9
10
11
12
def setup_seed(seed=202003):
random.seed(seed)
np.random.seed(seed)
# if you are suing GPU
torch.manual_seed(seed)
torch.cuda.manual_seed_all(seed) # if you are using multi-GPU
# for cudnn
torch.backends.cudnn.enabled = False
torch.backends.cudnn.benchmark = False
torch.backends.cudnn.deterministic = True
# for hash
os.environ['PYTHONHASHSEED'] = str(seed)

最后一行主要是为了禁止hash随机化,使得实验可复现。但是因为YOLOv3中含有上采样层,所以在进行实验时发现,在训练前期结果可以保持一致性,但随着epoch的增大,也会产生一定的不确定性,取两组训练过程的Loss可视化如下:

两组Loss值对比
两组Loss差值对比
可见随着训练的进行,结果难以复现,但最终mAP差异保持在1%左右即可。

Ref:

PyTorch中模型的可复现性 - 知乎
https://zhuanlan.zhihu.com/p/109166845

Deterministic Pytorch: pytorch如何保证可重复性 - 知乎
https://zhuanlan.zhihu.com/p/81039955

Set All Seed But Result Is Non Deterministic - PyTorch Forums
https://discuss.pytorch.org/t/set-all-seed-but-result-is-non-deterministic/27494